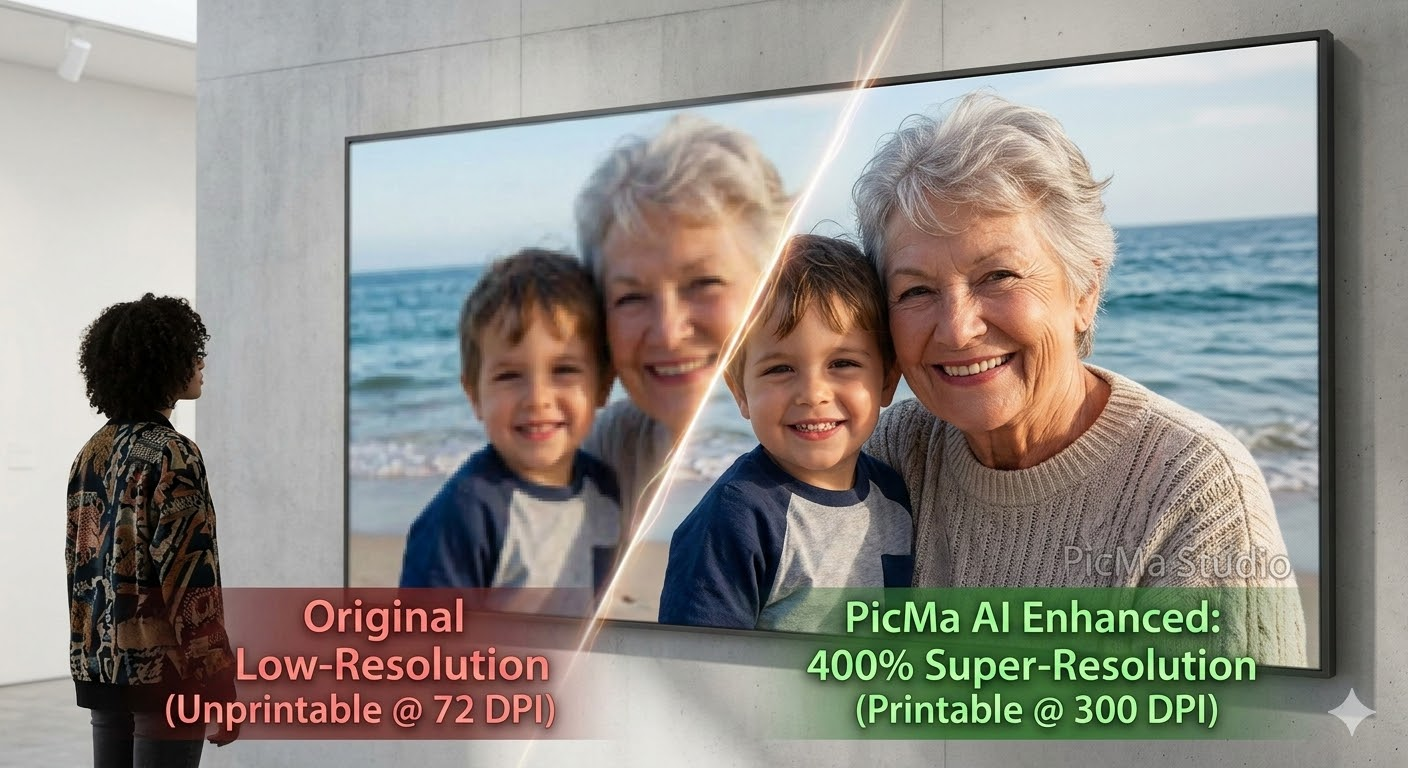
You just received your large-format print—a canvas for your living room or a poster for an upcoming event. But instead of a sharp, vibrant showpiece, you’re looking at a blurry, pixelated mess. That perfect digital photo that looked amazing on your phone has turned into a disappointing pile of pixels on paper.
This is the ultimate frustration for photographers, print-on-demand sellers, and anyone trying to preserve memories. The leap from screen resolution (72 DPI) to print resolution (300 DPI) is a technical hurdle that standard editing software often fails to clear . But what if you could bridge that gap in a single click?
Welcome to the era of AI photo enhancement. This guide will show you how to fix low-resolution images for large prints using PicMa Studio, turning your "unprintable" files into gallery-ready artwork.

Why Your Images Look Bad When Printed Large
To fix the problem, you must first understand it. The issue isn't your printer; it's a fundamental mismatch between digital displays and physical print.
Digital screens show images at about 72 pixels per inch (PPI). Printers, however, need 300 dots per inch (DPI) to create smooth, continuous tones . When you try to stretch a small digital file (like a standard 1024x1024 px AI image or a 12 MP phone photo) to fit a 24x36 inch poster, the software has to guess where to put the missing pixels. Traditional methods simply stretch the existing ones, resulting in the "jaggies" and blur we all dread.
Print Size and Resolution Cheat Sheet
To achieve a truly sharp print, your digital file needs to hit specific pixel dimensions. Here’s what the industry standard requires:
| Print Size (Inches) | Required Pixels at 300 DPI | Common Use Case |
|---|
| 12 × 18 | 3600 × 5400 | Medium Art Print |
| 18 × 24 | 5400 × 7200 | Standard Poster |
| 24 × 36 | 7200 × 10800 | Large Format Poster |
If your image doesn't meet these numbers, you need a solution that doesn't just stretch—it creates detail. That's where PicMa Studio comes in.
The Solution: Why AI Upscaling Beats Traditional Methods
In the past, your only option was Photoshop. You’d spend minutes (or hours) tweaking resizing algorithms, only to end up with a soft, plastic-like result. AI upscaling, specifically the engine powering PicMa Studio, works differently. It doesn't just resize; it reconstructs.
Using deep learning algorithms trained on millions of images, PicMa analyzes your photo's content—be it a face, a landscape, or a piece of digital art—and intelligently fills in the missing information . It adds texture to skin, sharpens edges on text, and clarifies details in backgrounds that weren't there in the original file. The result? A image that is not only larger, but actually looks cleaner and more detailed than the source.
How to Fix Low-Resolution Images in 4 Simple Steps
Forget complex software tutorials. PicMa Studio is built on the principle of professional results with zero learning curve. Whether you are using the web platform or the mobile app, the workflow is the same .
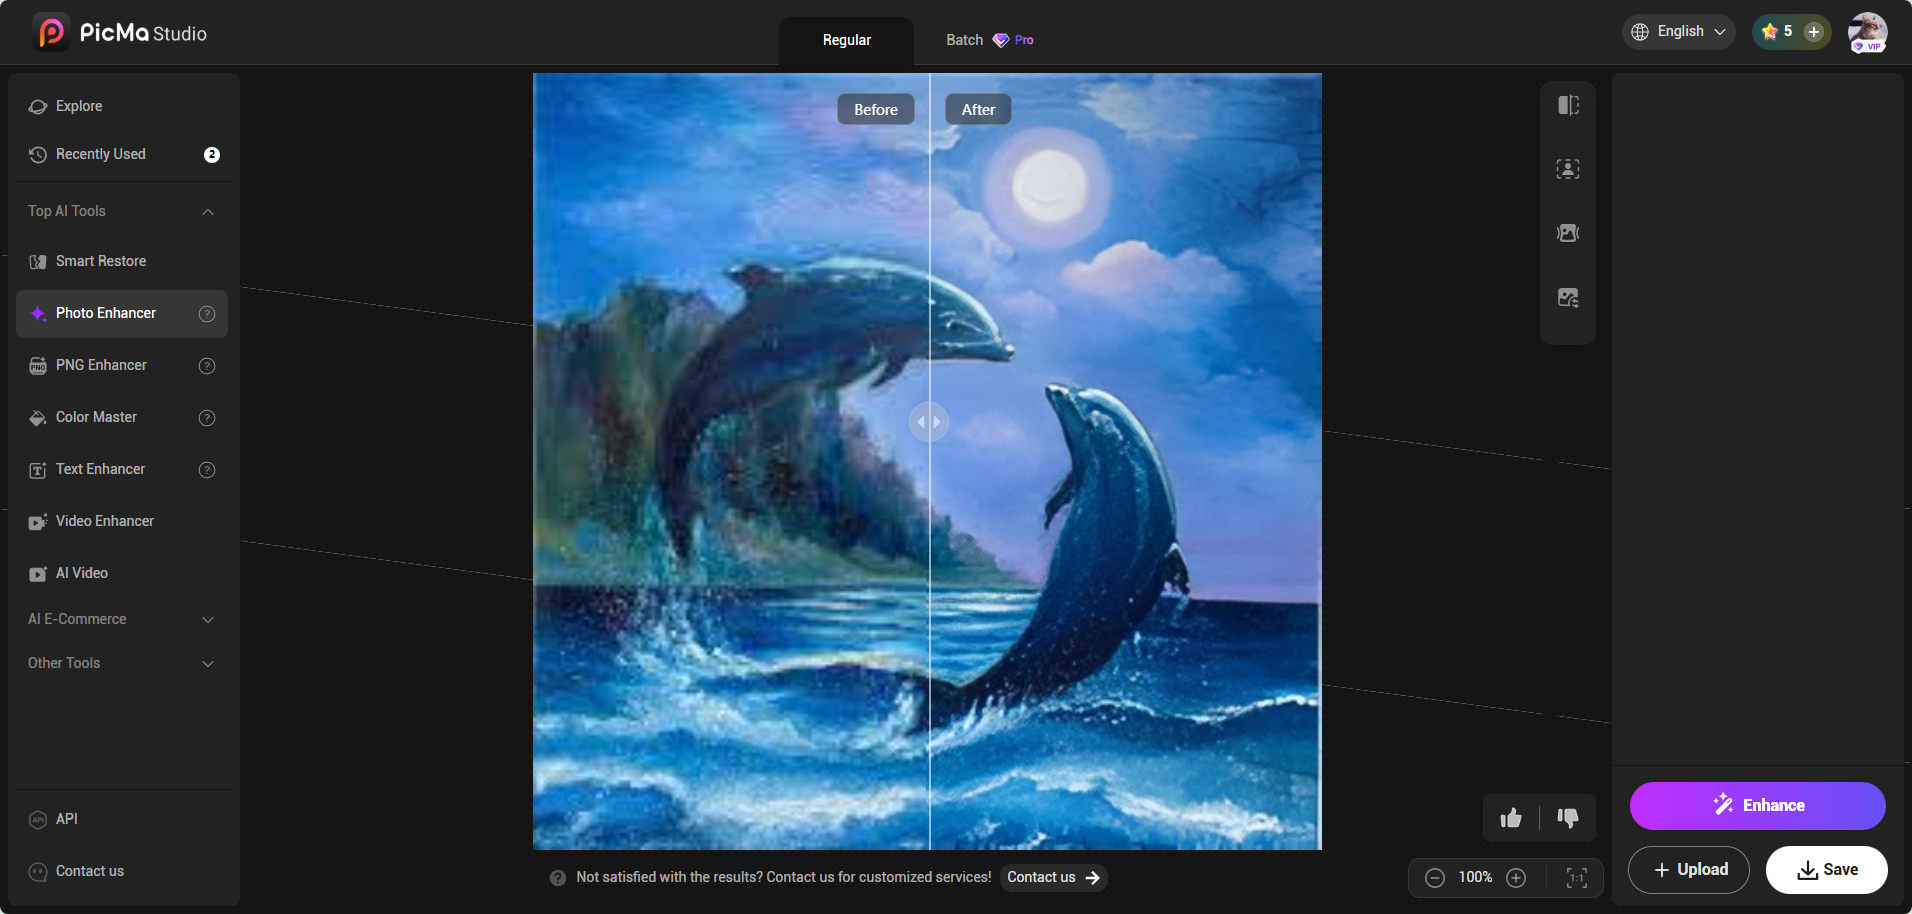
Step 1: Upload Your Image
Navigate to PicMa Studio and access the “Photo Enhancer” section. You can drag and drop your file or upload it directly from your device. If your file happen to be PNG format, you can choose to use PNG Enhancer.
Step 2: Let PicMa AI Do the One-Click Enhancement
Once uploaded, wait for few seconds for the result. This is where PicMa Studio stands out. You don't need to select complex algorithms, you simply click the Enhance button.
Step 3: Preview and Export in High-Resolution
In seconds, your new image is ready. You can preview the before-and-after result to see the incredible difference. Once satisfied, you download the image in full resolution, now ready for a professional large-format print .
Real-World Applications: Where PicMa Shines
PicMa isn't just a tool; it's a production shortcut for anyone who needs quality prints .
- Print-on-Demand Sellers: Ever had a design rejected by a platform like Printify because it didn't meet their 300 DPI requirement? PicMa ensures your files are always print-ready, helping you avoid returns and unhappy customers .
- Photographers: When a client brings you a cherished old photo taken on a low-res phone, you can now confidently deliver a framed print. PicMa acts as your "workflow bridge," turning bad originals into deliverable products .
- Digital Artists: AI-generated art from Midjourney or DALL·E often maxes out at low resolutions. PicMa bridges the gap between "screen ready" and "print ready," allowing you to sell your digital creations as physical wall art .
- Preserving Memories: Those faded, grainy family photos scanned from the 80s? PicMa brings them back to life, removing noise and restoring color so you can blow them up for a family reunion without embarrassment .
Conclusion: Stop Resizing, Start Enhancing
You no longer have to reject a great photo just because it doesn't have enough pixels. The technology to create stunning large prints from small files exists, and it fits in your pocket.
With PicMa Studio, the complex science of AI upscaling is packaged into an intuitive, one-click experience. It removes the technical barriers between you and your creative vision. Whether you're decorating your home, fulfilling customer orders, or gifting a memory, PicMa ensures that what you see on screen is just the beginning of what you can achieve on paper.
Ready to turn your pixelated past into a high-definition future? Try PicMa Studio today.
Frequently Asked Questions (FAQ)
Q1: What DPI is best for large-format printing?
Generally, 300 DPI is the gold standard for prints that will be viewed up close, such as art prints and photo books. For very large banners or billboards viewed from a distance, you can sometimes go as low as 150 DPI, but for quality, stick to 300 .
Q2: Will enhancing a photo with PicMa reduce its quality?
No. Unlike traditional resizing, PicMa uses AI to upscale the image. It actually increases the pixel count and reconstructs details, maintaining or even improving the perceived quality while removing noise and grain .
Q3: Can I print a photo directly from my iPhone as a large poster?
Yes, but you need to upscale it first. A standard 12MP iPhone photo is roughly 4000x3000 pixels. While great for a small print, this only translates to about a 13x10 inch print at 300 DPI. To get a crisp 24x36 poster, you must run it through PicMa’s enhancer to increase the resolution 4x or more .
Q4: What is the difference between JPEG and PNG for printing?
PNG is a lossless format, meaning it retains all the detail and is technically superior for your master file. However, High-Quality JPEG (100% quality) is the industry standard for most print shops because the file sizes are more manageable. A good practice is to save your PicMa-enhanced file as a PNG for your archive and export a high-quality JPEG for uploading to the print service .
Q5: Is PicMa Studio free to use?
PicMa offers everyone 10 free trials to enhance images and test the quality. For advanced functions, higher resolution caps, and batch processing, you can upgrade to a VIP plan
Related Readings:
 113
113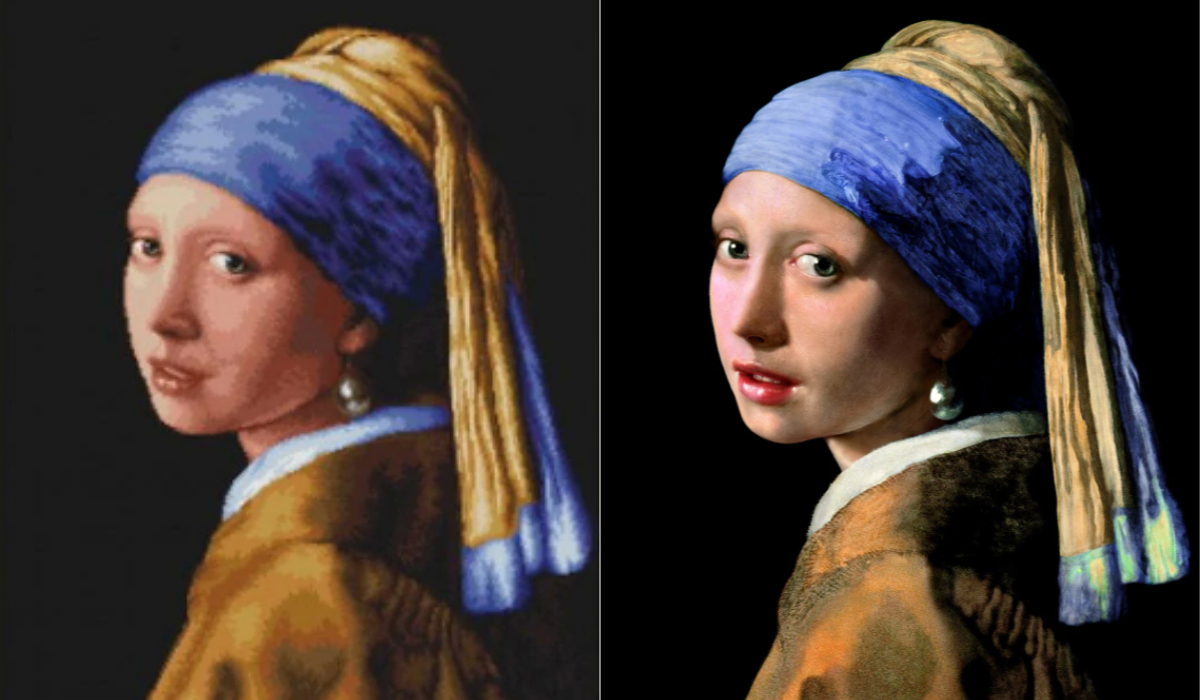
 English